Getting Started with ArcGIS Pro
This page will walk you through the process of installing and licensing ArcGIS Pro on your OIT Managed device running Windows. Before installing or upgrading ArcGIS Pro, ensure that your system meets the minimum requirements to run it. Please check Esri’s support page for ArcGIS Pro 3.X system requirements to verify the operating system and other environment prerequisites are met.
OIT Managed device running Windows
Our license covers ArcGIS Pro installations on managed and faculty/staff/student computers across campus. The GIS application ArcGIS Pro, the latest professional desktop GIS application from Esri, will be available for employees via the Software Center. For staff and faculty users on a university provided computer, please install ArcGIS Pro from the Software Center.
Download and Installation Instructions
On Windows
Step 1
Click the Windows Start button
Step 2
Scroll to Microsoft Configuration Manager
Step 3
Select Software Center (must be on campus network or using campus VPN)
Step 4
Install ArcGIS Pro 3.5
ArcGIS Pro Login Instructions
If you want to publish to ArcGIS Online or access layers and information created in a web app, you need to be signed in to your ArcGIS Online organization.
Step 1
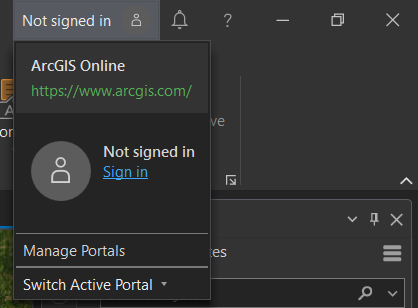
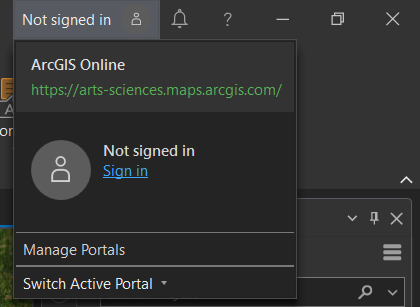
From an open project in ArcGIS Pro go to the account area in the top right corner and select Manage Portals
Step 2
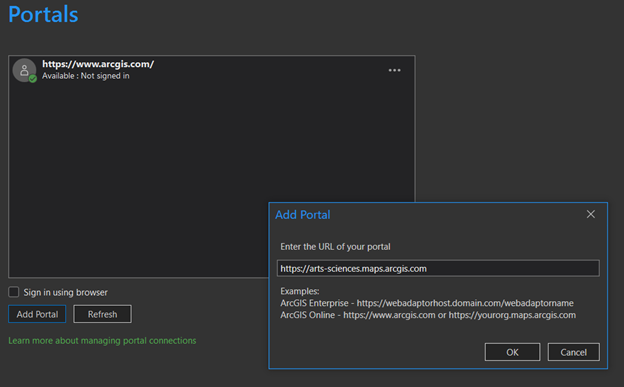
Select Add Portal and for the portal URL enter https://arts-sciences.maps.arcgis.com
Step 3
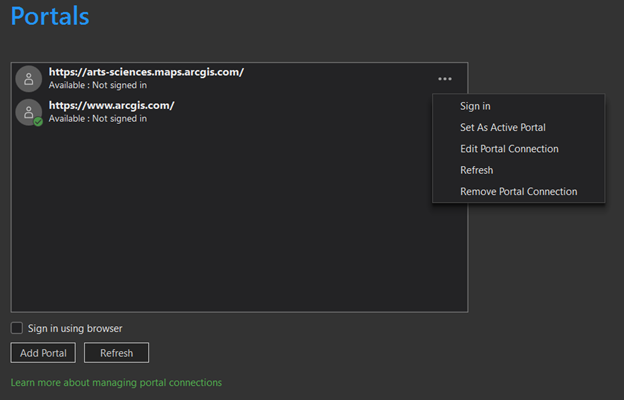
Using the menu to the right of the portal URL, select Set As Active Portal. The green check mark will move to that URL
Step 4
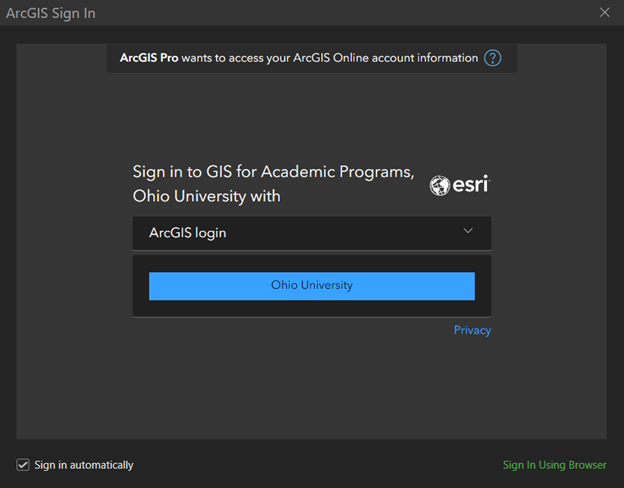
Returning to the account area, verify that the arts-sciences portal is active and choose sign in
Step 5
Log in using your OHIO ID and password.